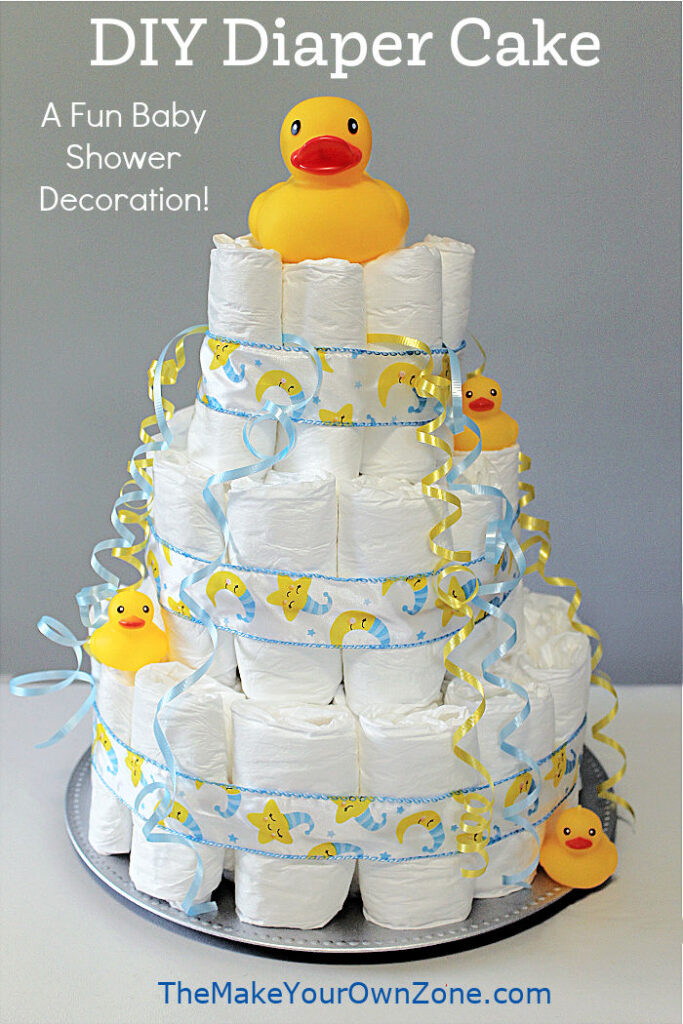
How Do You Make a Diaper Cake for a Baby Shower
One of the artistic things people ofttimes make for a babe shower ornament is something called a "diaper cake", a beautiful centerpiece that's made to look like a iii tier cake, but it's synthetic out of disposable diapers. And after the shower, the mom-to-be gets to go dwelling house with all those helpful diapers too.
I recently helped to plan a baby shower, and when the subject of decorations came up, I suggested it might be fun to have a diaper cake and volunteered to do the crafting. Yes, I said, let's make our own diaper cake!
Gathering Your Diaper Cake Supplies
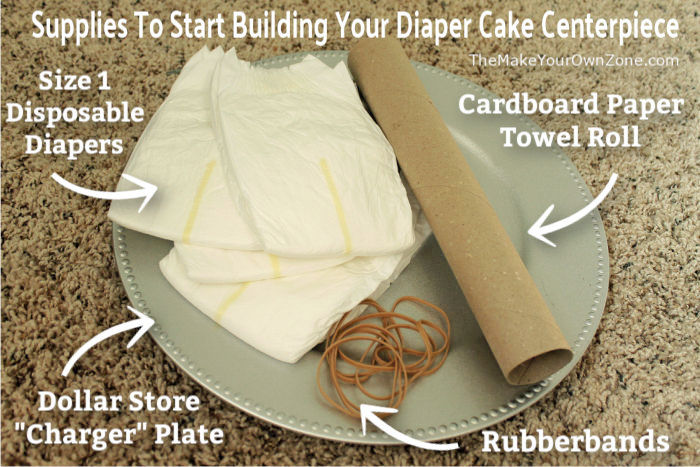
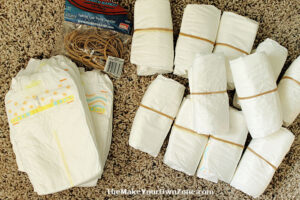
To go started making your diaper cake, you'll demand to gather together a few elementary supplies. One of my first stops was the dollar store where I was able to score a few fun doo-dads. Here's the list of what I used:
- A large plate or paper-thin circle (I used a xiii″ dollar store "charger" plate)
- Empty paper-thin tube from a roll of paper toweling
- Condom bands (already in my stash)
- String (already in my stash)
- Wide Ribbon (I institute a roll of 1-ane/2″ ribbon at the dollar store)
- Tape, Pins, or Hot Glue Gun (for securing the ribbon)
- Embellishments (dollar shop mini safe duckies!)
- Disposable diapers (more on the diapers beneath)
Here'due south a photo of some of these items that I used to get started:
How Many Diapers Do You Need to Make A Diaper Cake?
The main component of your diaper cake is of course, the diapers. I decided to use Size ane dispensable diapers every bit these were not the very smallest newborn size, however they were nonetheless small enough to exist helpful for getting started with a new baby.
I ended up using 50 diapers for my diaper cake and would suggest that as a minimum amount you would need. You could certainly make a larger cake with more or bigger layers, but using 50 diapers will give you a diaper block that'south about 14″ tall which is a squeamish centerpiece size.
The ane small frustration y'all may have with the 50 diaper corporeality is the way diapers come packaged. The size ane diapers I purchased came in a 44 pack, which meant I had to buy 2 packs and had several diapers left over. I just brought my extra diapers along to the babe shower and made sure to send them home with the mom-to-be.
Diaper Cake Step-By-Step Assembly Instructions
One time you take all your supplies gathered together, yous can brainstorm building your diaper cake. Here are the steps I used:
Pace 1: Roll Upward The Diapers – Considering you will be standing the diapers up their sides, you'll need to roll them up into trivial bundles. For the size 1 diapers that I used, I folded/rolled them into thirds and so secured them with a rubber band. The diapers I used too had a little fleck of a print design on them, which I rolled to the inside to keep more than of the white function of the diaper showing.

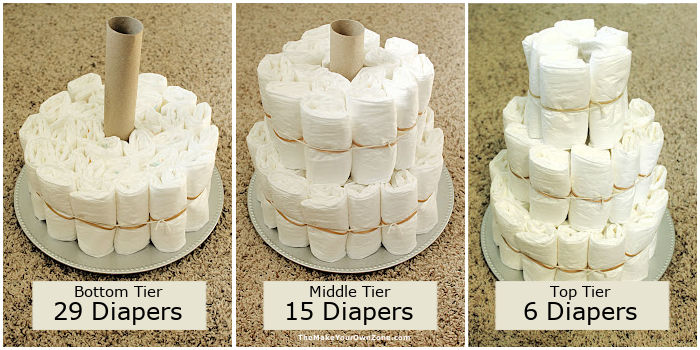
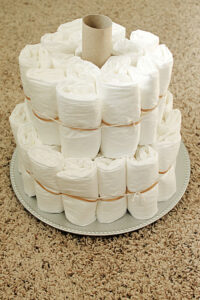
Footstep ii: Build The Lesser Tier – Set the cardboard paper toweling tube in the eye of the plate (you can tape it to the plate to make it more than secure if you wish). Outset placing the diaper bundles around the tube. I used 29 diapers for my bottom tier which concluded upwardly being 3 layers around the tube.
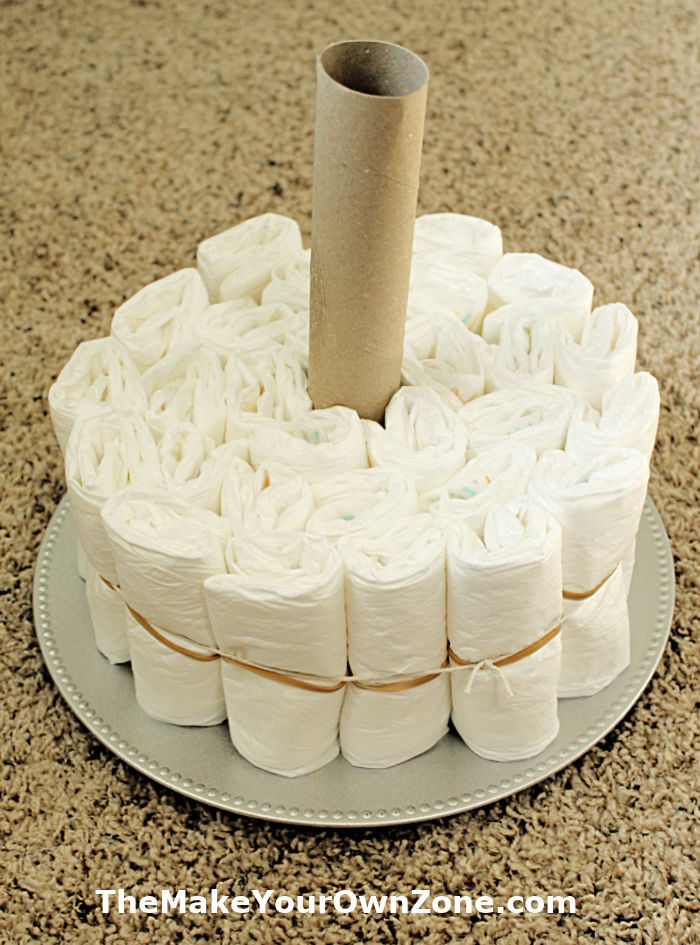
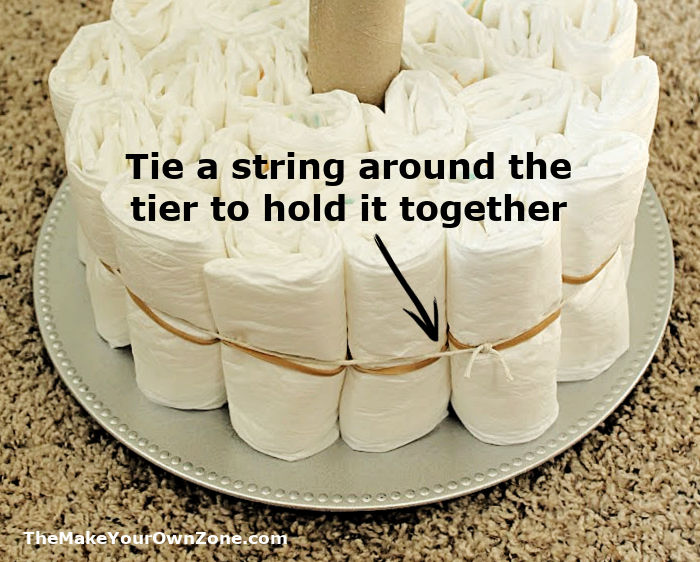
Step 3: Secure the Tier with String – Once y'all have the diaper bundles for the first tier bundled around the cardboard tube, y'all'll desire to keep them in place by tying a string around the them. Wrap the cord around the middle of the tier in the same expanse as the rubberbands, make a small-scale knot, and clip any remaining ends of the string brusque.
Step 4: Repeat for the Middle Tier – For the eye tier, arrange xv diapers around the cardboard tube, setting them on elevation of the lesser tier. The middle tier will be ii layers around the tube. Secure the tier with a string.
Step v: Echo for the Top Tier – For the top tier, arrange vi diapers effectually the paper-thin tube, setting them on top of the centre tier. The diaper bundles will at present extend to a higher place the tube a little bit. Secure the tier with a string.
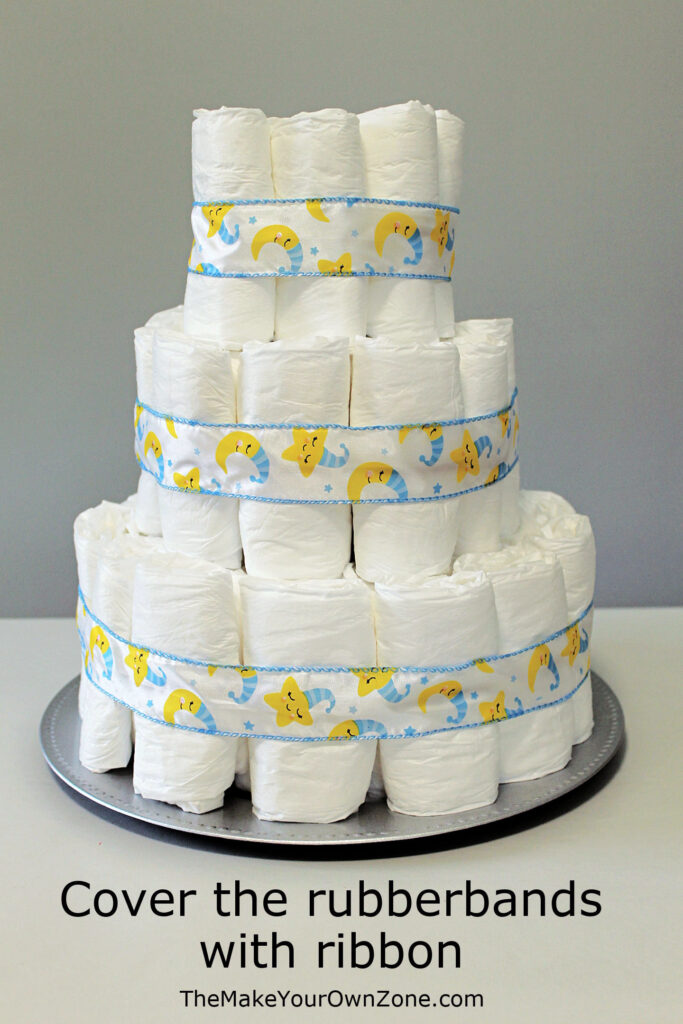
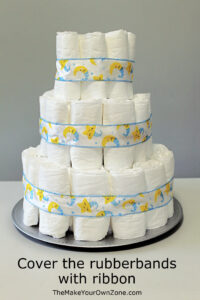
Step half dozen: Encompass the rubberbands and string with ribbon – Now that the diaper cake is assembled, we realize that the diaper cake is not a math newspaper and nosotros do not want to prove our work. And then to hide the condom bands and cord, you lot'll want to cutting pieces of ribbon to an appropriate length and wrap it around the rubber band area on each tier. I used ribbon that was i-i/2″ broad and needed virtually 2-i/ii yards total . I held the ribbon in place with some double stick tape and pins. You could perhaps likewise apply hot glue.
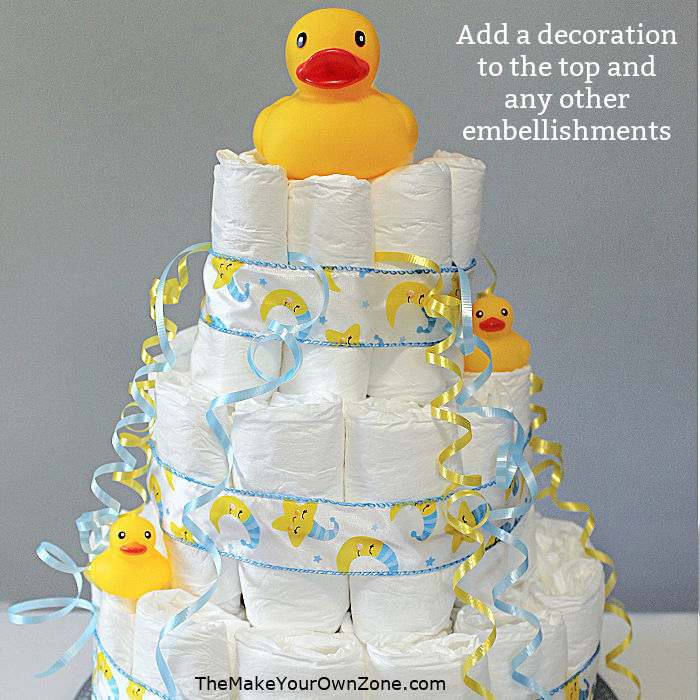
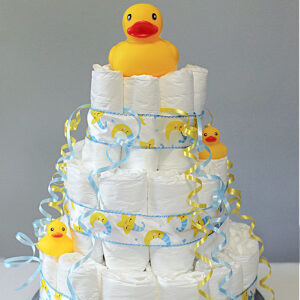
Step 7: Add together Embellishments – Finally, you lot'll want to add some decorations and embellishments to your diaper cake. In item, you'll want something to set on peak of the block to cover the opening where the cardboard tube is. I used a rubber duck on the top of the cake, and so added some curling ribbon and my dollar store mini rubber ducks. This last footstep is where y'all can be as creative every bit y'all would like! You tin can decorate using a theme or add lots of little items to your block for the mom-to-exist to take home after the shower.
And and then your work is done and yous've fabricated your ain diaper cake! I found that this project went along faster and easier than I idea. I think you'll find that making a diaper cake is definitely fourth dimension well spent as not only is it a beautiful and decorative add-on to the baby shower, it'south a practical and useful item that the mom-to-exist can have domicile with her too.
Hither are the consummate diaper cake printable instructions:
How To Make A Baby Shower Diaper Cake
A fun decoration for a baby shower is a DIY diaper cake centerpiece that can be made with simple supplies. It's a applied and useful gift for the mom-to-be to take home with her after the shower too.
Yield: 1 Centerpiece
- 50 Disposable Diapers (I used size ane)
- one Large plate or paper-thin circle (Approx thirteen")
- 1 Cardboard tube from a scroll of paper toweling"
- l Medium Size Rubber bands
- String
- 2-1/two yards 1-one/2" Wide Ribbon
- Tape, Pins, or Hot Glue Gun (for securing ribbon)
- Pocket-sized Babe Item for a cake topper
- Other small babe items or embellishments
-
Roll each of the diapers and secure with a safe band. (I folded/rolled my size 1 diapers into thirds).
-
Make the bottom tier of the block past continuing the cardboard scroll upwards in the middle of the plate (you may wish to secure information technology with some tape), and then placing 29 rolled diapers effectually it, continuing them on end. This will be three layers of diaper bundles circling around the tube. Secure the tier by tying a piece of string around the middle of the tier in the same surface area as the safety bands.

-
Make the heart tier by arranging xv diapers around the paper-thin tube, setting them on top of the bottom tier. This volition be two layers around the tube. Tie a cord around the tier to secure information technology.
-
Make the superlative tier by arranging half dozen diapers effectually the paper-thin tube, setting them on height of the middle tier. This volition be 1 layer around the tube, and the diapers volition extend a little flake above the tube. Tie a string effectually the tier to secure information technology.

-
Comprehend the rubber bands and string on each tier by cut a slice of the ribbon to an appropriate size and wrapping information technology around the tier, securing it in place with record, pins, hot gum, or a combination of those items.
-
Cease the diaper block by placing a baby item on top of the cake to cover the cardboard tube area. Add whatever other pocket-sized baby items or curling ribbon streamers to the cake every bit desired.

Need a few more than brilliant ideas?
Sign upwardly for the monthly email newsletter to learn almost my latest content and tips for frugal homemade living.
Source: https://www.themakeyourownzone.com/how-to-make-a-diaper-cake-centerpiece/
0 Response to "How Do You Make a Diaper Cake for a Baby Shower"
Post a Comment